How to use PBR Textures in Unreal Engine
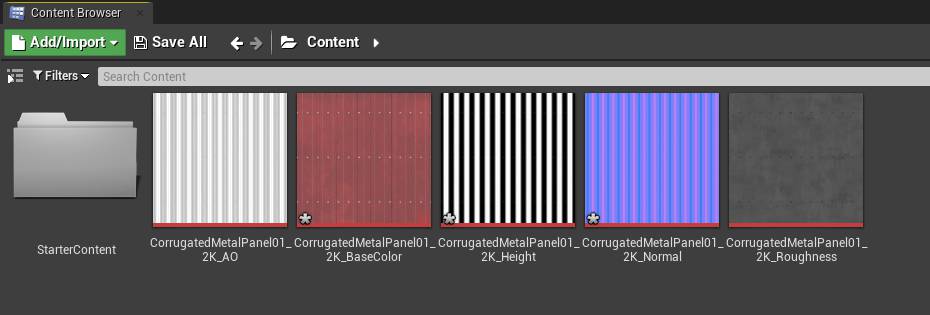
Importing Textures
Drag and drop the texture maps of a material into the content browser or use the green Add/Import button.
Texture Settings
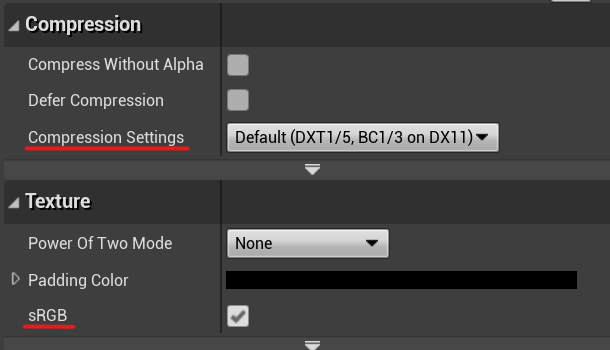
By double-clicking a texture, you can edit its settings. The two options that you need to care about are the compression settings and the sRGB check.
Compression Settings
Unreal Engine usually automatically recognizes the optimal compression settings for a texture.
If you run into some problems, make sure that for AO, Base Color, Roughness and Metallic maps, the compression settings are set to Default (DXT1 /5, BC1 /3 on DX11). For normal maps, set the compression settings to Normalmap (DXT5, BC5 on DX11).
sRGB
The sRGB tick determines whether a texture should be gamma-corrected or not. As a rule of thumb, textures that will end up in the Base Color input of the material node (AO and Base Color) should have sRGB enabled, others (Roughness, Metallic, Normal) should not.
For further information on texture settings, please refer to the Textures page in the Unreal Engine 4 documentation.
Setting up a material
To create a new material, right-click in an empty space in the content browser and choose Material. Double-click the material that you've just created to open it in the node editor.
Adding Nodes
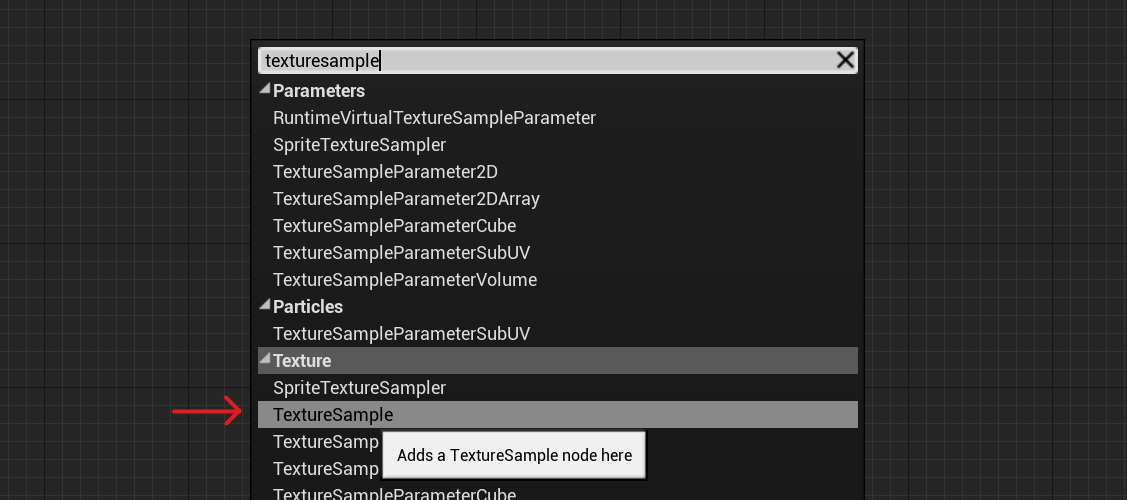
To add a texture to the material, you need a TextureSample node. Right-click anywhere in the material graph view and search for the TextureSample. You can also add one by pressing "T" and then clicking where you want to place the node.
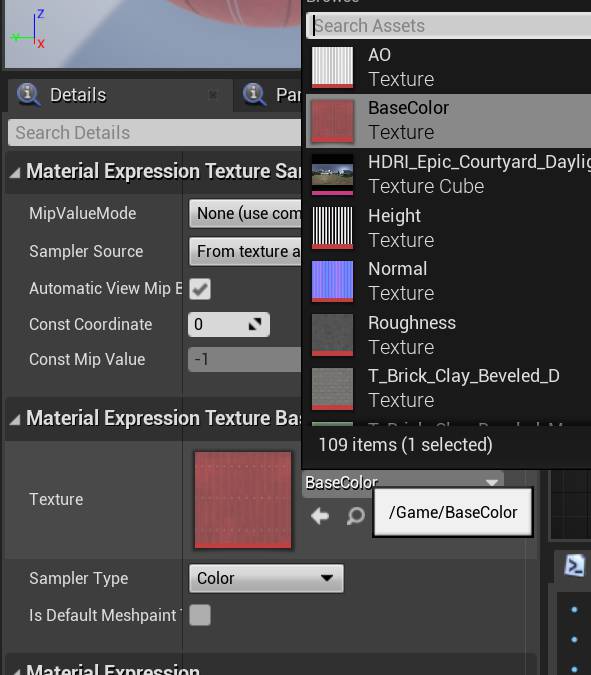
To add a texture to the node, go to the details panel and choose one from the dropdown.
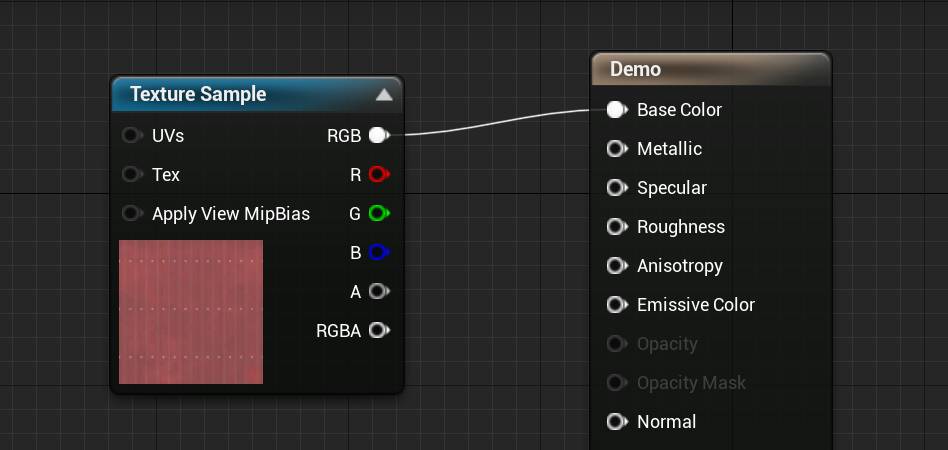
Base Color
Connect the base color map to the Base Color input of the material.
Ambient Occlusion (AO)
The AO map is used to darken the areas in a material that light is less likely to reach. Combine this texture with the Base Color map using a multiply node. You can use a LinearInterpolate (Lerp) node to make the AO effect more subtle.
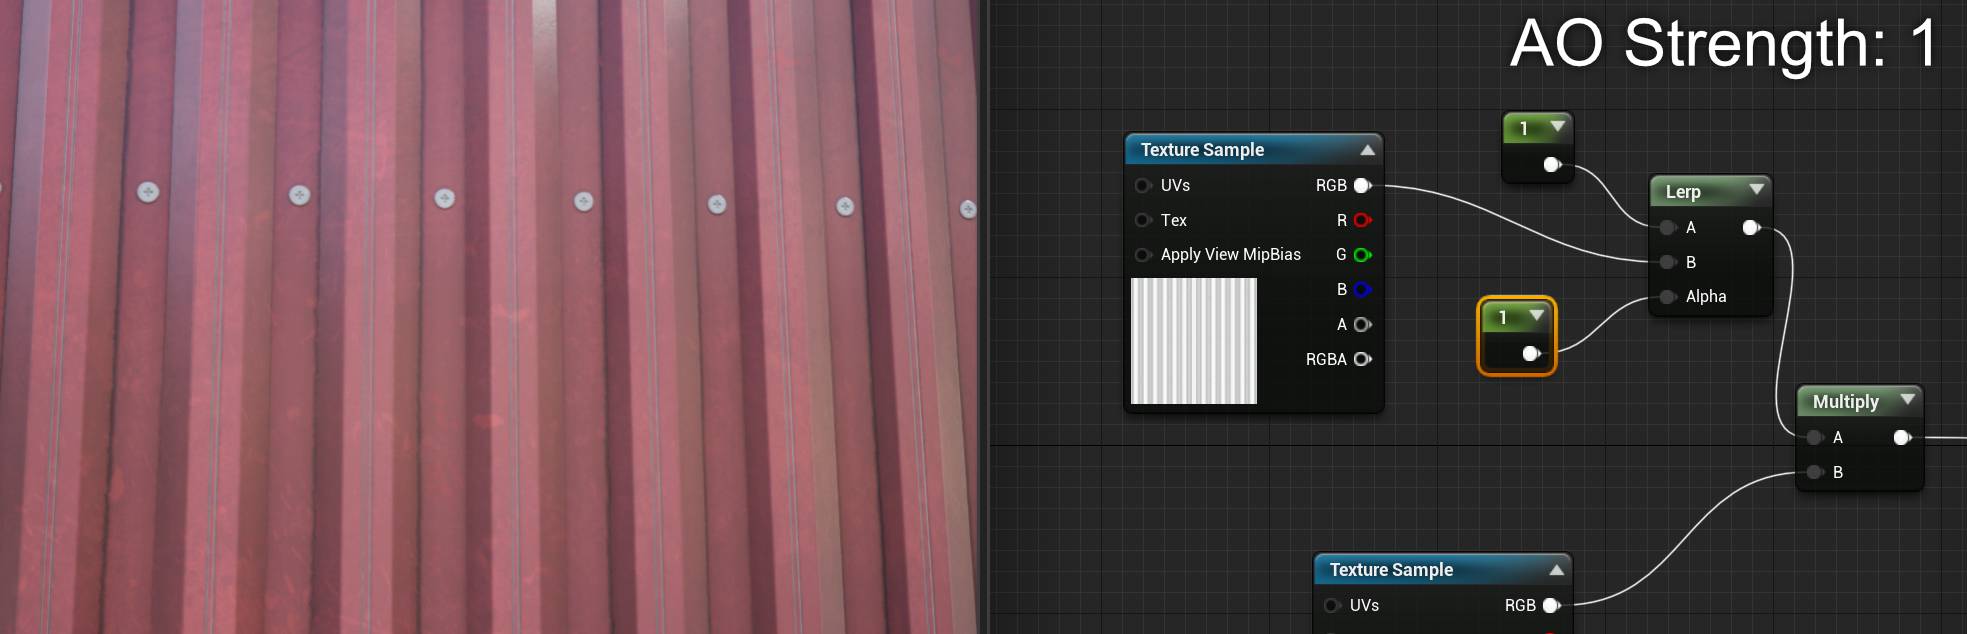

Note: You can also connect the AO map to the Ambient Occlusion input in the material node, but this only works when using Static or Stationary light sources. To find out more about this, read the Ambient Occlusion section on the page on material inputs in the Unreal Engine 4 documentation.
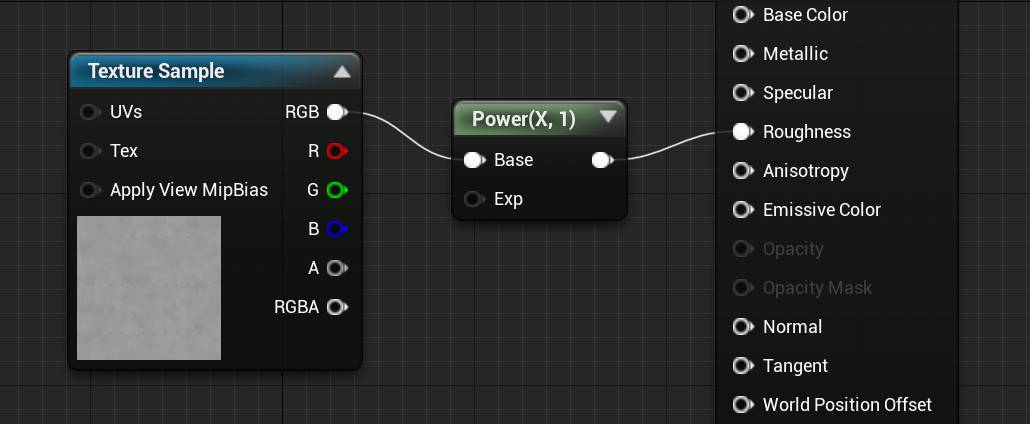
Roughness
The roughness map defines how rough or smooth your material's surface is. Connect it to the Roughness input in the material node. You can use a Power node to further tweak the roughness. (A lower exponent means the material's surface will become rougher and vice versa).
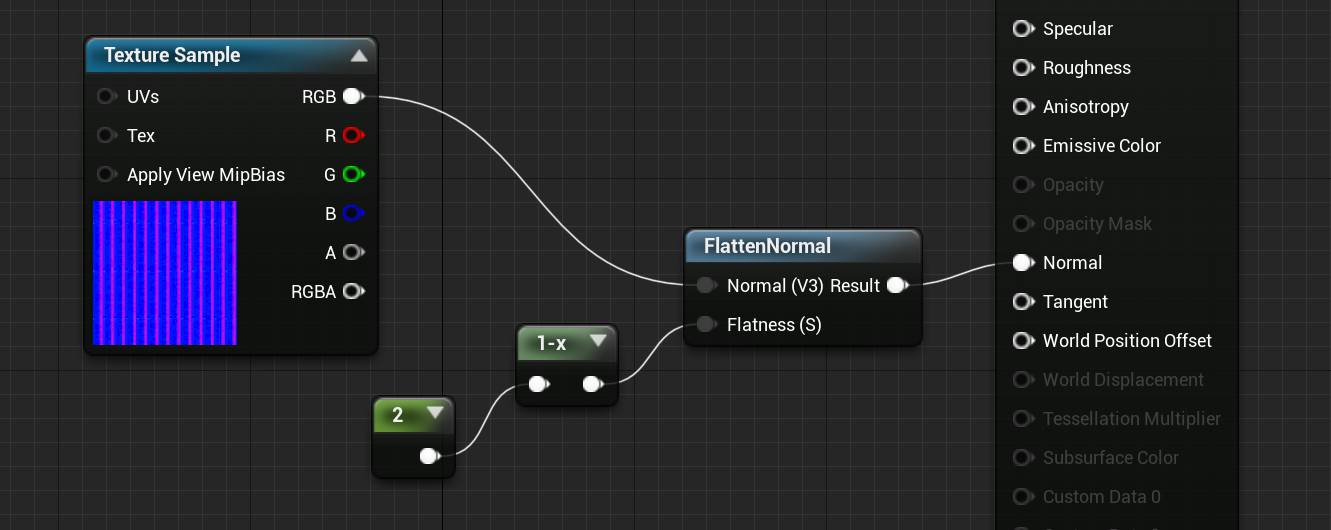
Normal
Connect the normal map to the Normal input of the material node. You can use a FlattenNormal node and a OneMinus (1-x) node to change the strength of the normal map.
Tips and Tricks
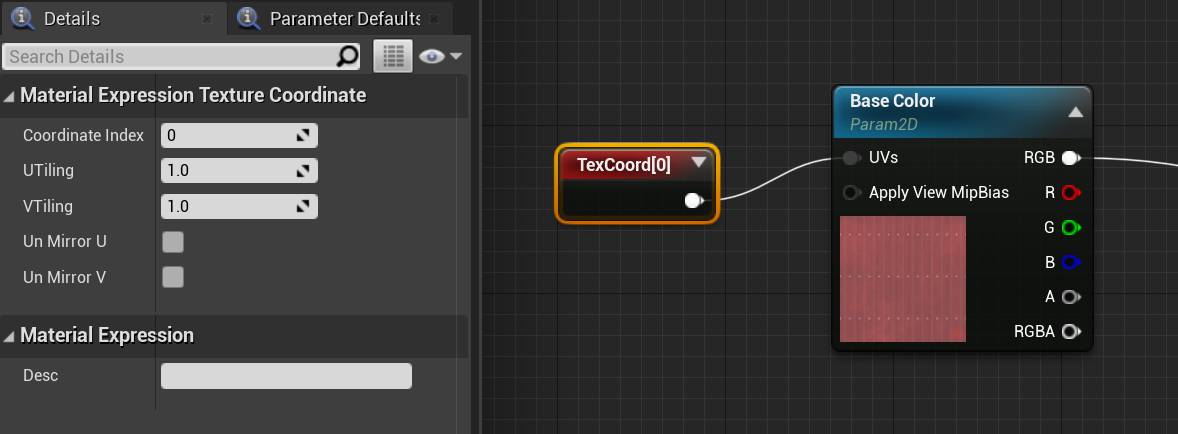
Adjusting the size of a texture
To adjust the size of the texture, add a TextureCoordinates node and connect it to the UVs input of the TextureSample node. You can change the size of the texture by adjusting the UTiling and VTiling values.
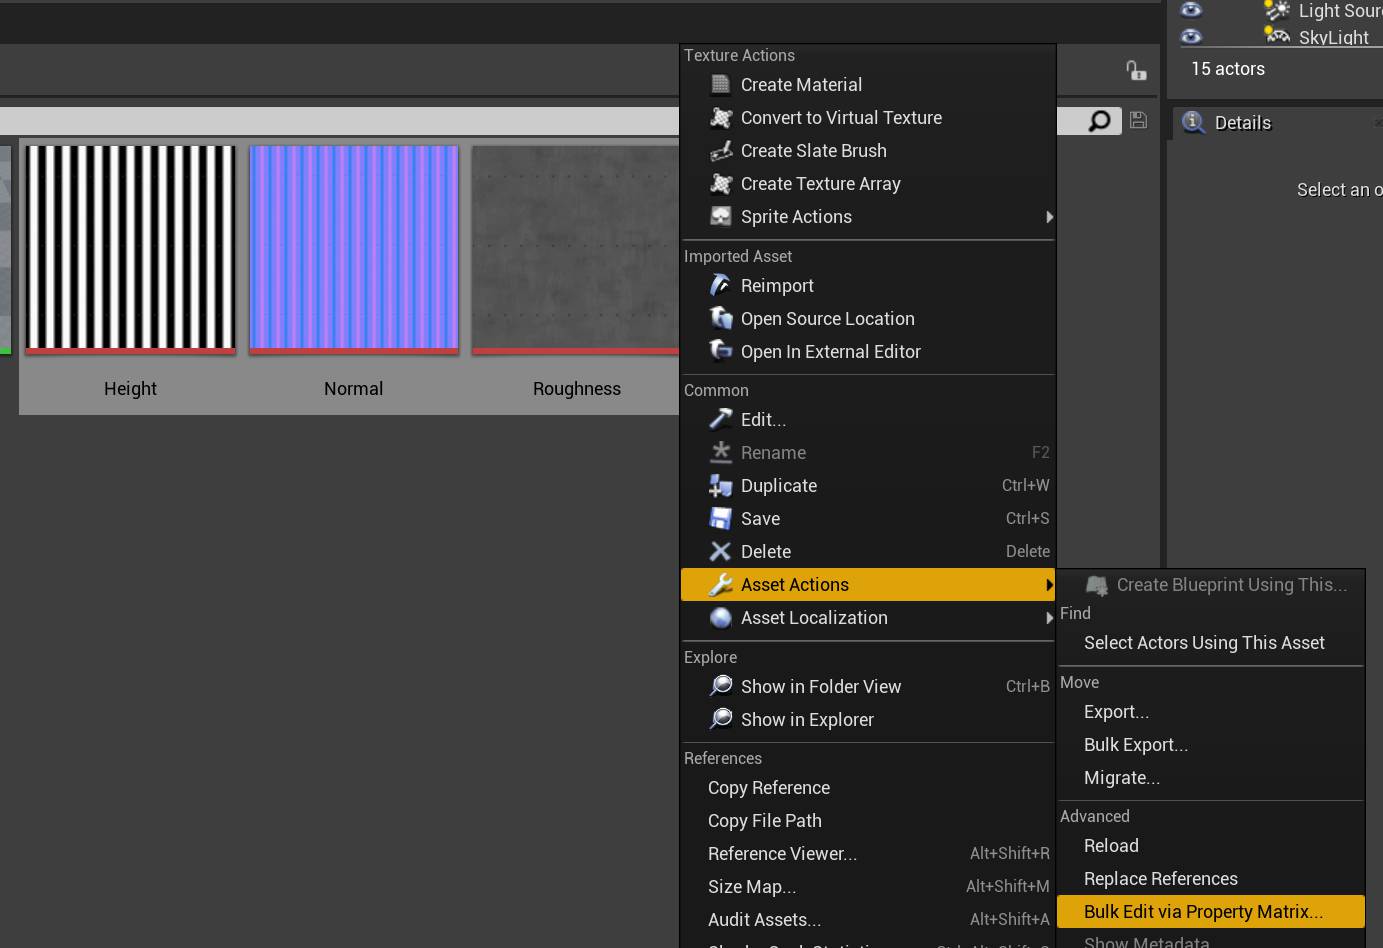
Editing multiple textures at once
If you've imported a lot of textures and don't want to edit the textures' settings one by one, you can edit multiple textures by using the property matrix.
Select all the textures you want to edit, right-click and then go to Asset Actions > Bulk Edit via Property Matrix.
You can now edit all textures at once by adjusting the properties in the panel on the right side.

Material Instances
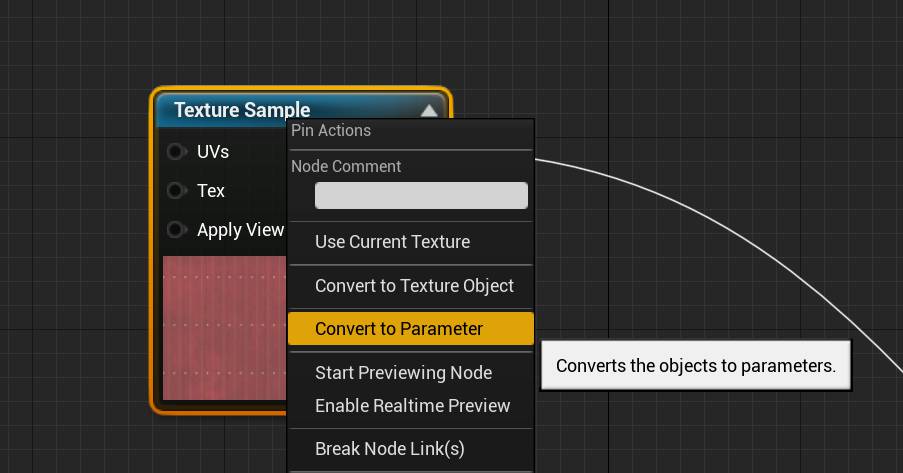
In Unreal Engine, there's a useful feature called Material Instances. Material instances allow you to create a lot of variations of a material that all share the same node tree but have different textures or values in a select few nodes.
To define which values you want to be able to change after creating the instance, right-click the corresponding node and click on Convert to Parameter.
If you now go back to the content browser, you can create a material instance by right-clicking the material.
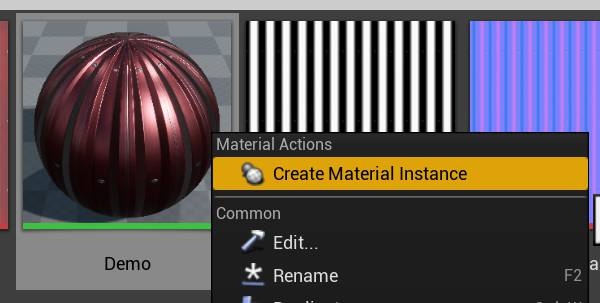
If you then double-click the newly created material instance, you can adjust the values and change the textures that you've previously converted to parameters.

This makes it much simpler to author a large library of materials.